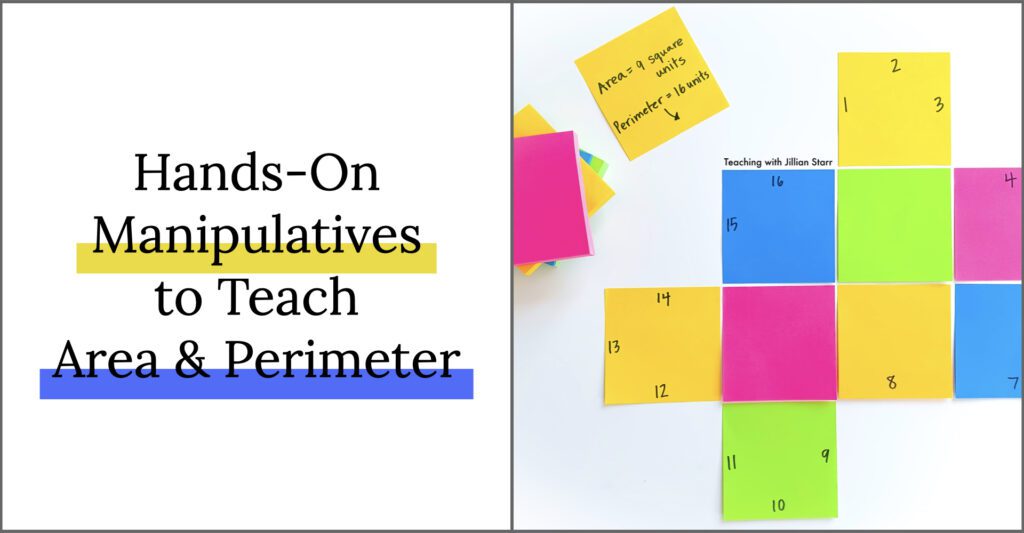
Ready to kick-off your area and perimeter units with a bang? Teaching and learning real-world math requires scaffolds that break down big concepts. That’s why I always use manipulatives to support conceptual understanding of area and perimeter. And there are some manipulatives I cannot teach without.
Today I’ve compiled a list of my top five manipulatives for teaching area and perimeter with manipulatives. This list meets a range of learning needs. Take a read and decide which ones are best for your students.
Introduce Area and Perimeter with Square Colored Tiles
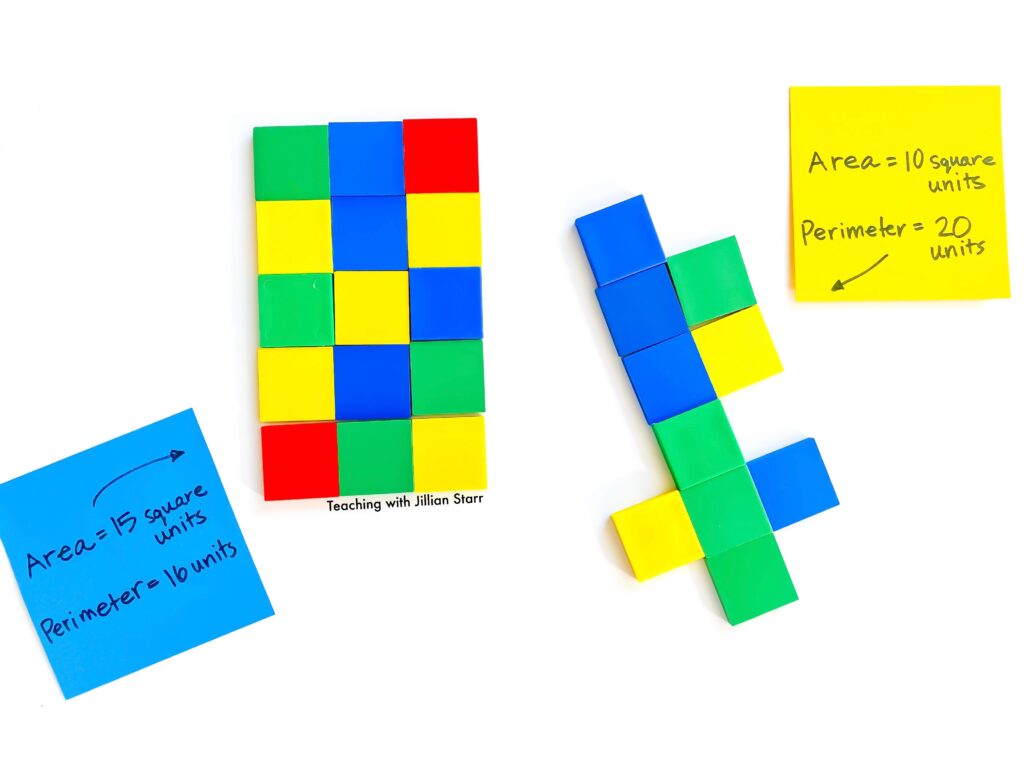
Square colored tiles are the holy grail of manipulatives. They are one of the first manipulatives I use in my area and perimeter units, and they tend to be a favorite among my students throughout. Why? Simplicity and flexibility!
A Great Manipulative for 1-1 Correspondence
If you’re new here, you should know that square color tiles are a true favorite. I use square colored tiles to teach arrays. They are a direct visualization of equal rows or columns. Students can easily rearrange and pull apart the tiles. Most importantly, students can use one-to-one correspondence depending on their level of proficiency. Here’s the best part: Using square colored tiles for arrays will effortlessly transition into their use for area.
Translate Arrays into Area
Your students are ready to build on their understanding of arrays in multiplication. It is time to apply it to area. In the beginning, the concept of area doesn’t differ much from that of arrays in multiplication. As students build arrays, I introduce related vocabulary words with those arrays. Students learn area, length, width, and square units.
Distinguishing Perimeter
While I use many manipulatives to teach area, the tools for perimeter are surprisingly more limited. Some students have difficulty understanding the difference between area and perimeter. They require manipulatives that make it easy to identify the two. Learning perimeter incorporates one-to-one correspondence and an understanding of arrays.
As we move to building rectangles from square colored tiles and naming area, we begin to discuss perimeter. “If we only walked on the outer tiles, how many tiles would it take to walk around the entire rectangle?”
Over the years, I’ve found there are two ways to emphasize perimeter versus area using square colored tiles:
- Replace the outer tiles with a different color.
- Remove the inner tiles, leaving only the perimeter.
Endless Differentiation
Here’s another reason I love square colored tiles. They allow for easy, simple differentiation. I’ve had classes where there is a massive range of student understanding of area and perimeter.
For students earlier in their mathematical development, you can continue to use square-colored tiles to create smaller arrays/areas and name them.
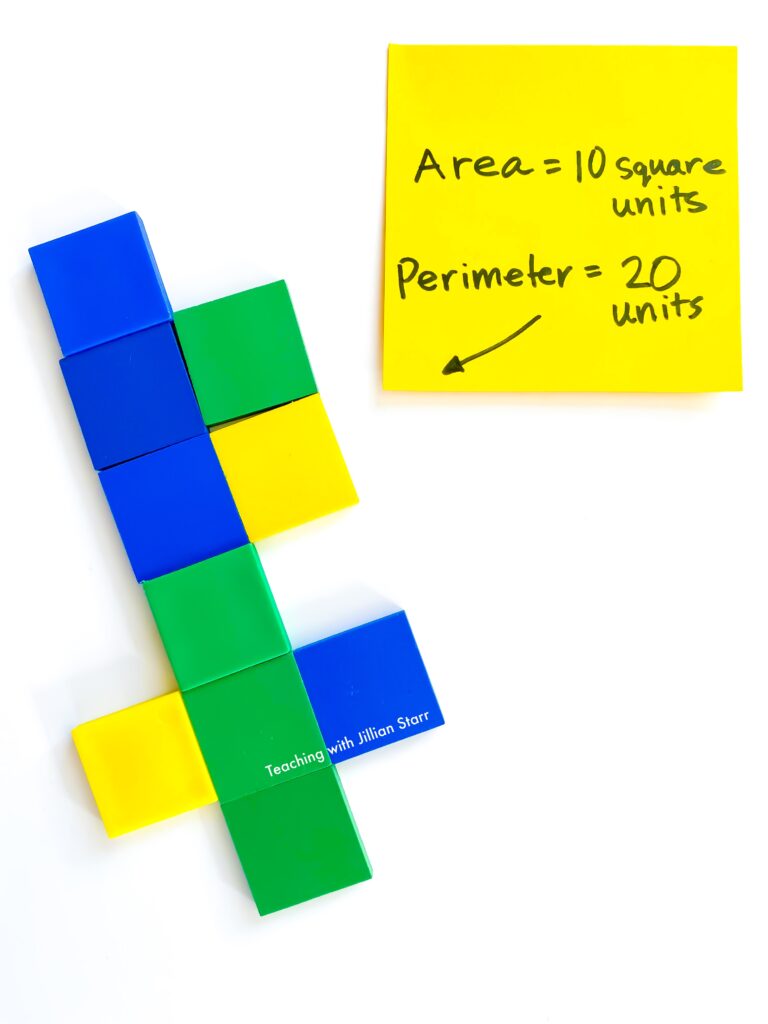
Are your students ready to apply their knowledge to more significant, creative thinking? It might be time to introduce floor plan design. Square color tiles are an excellent manipulative for finding area and perimeter as students build a floor plan. They can use different colors for different rooms and build their dream home floor, and find the area of each room and the entire floor plan.
Post-It Note Area and Perimeter
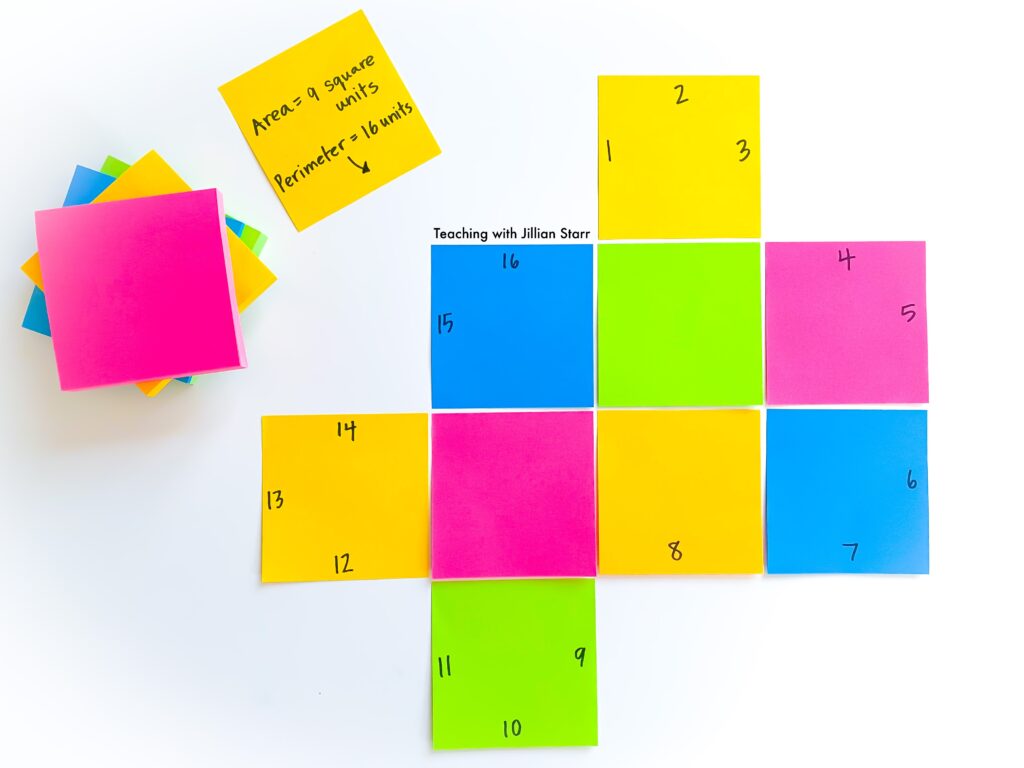
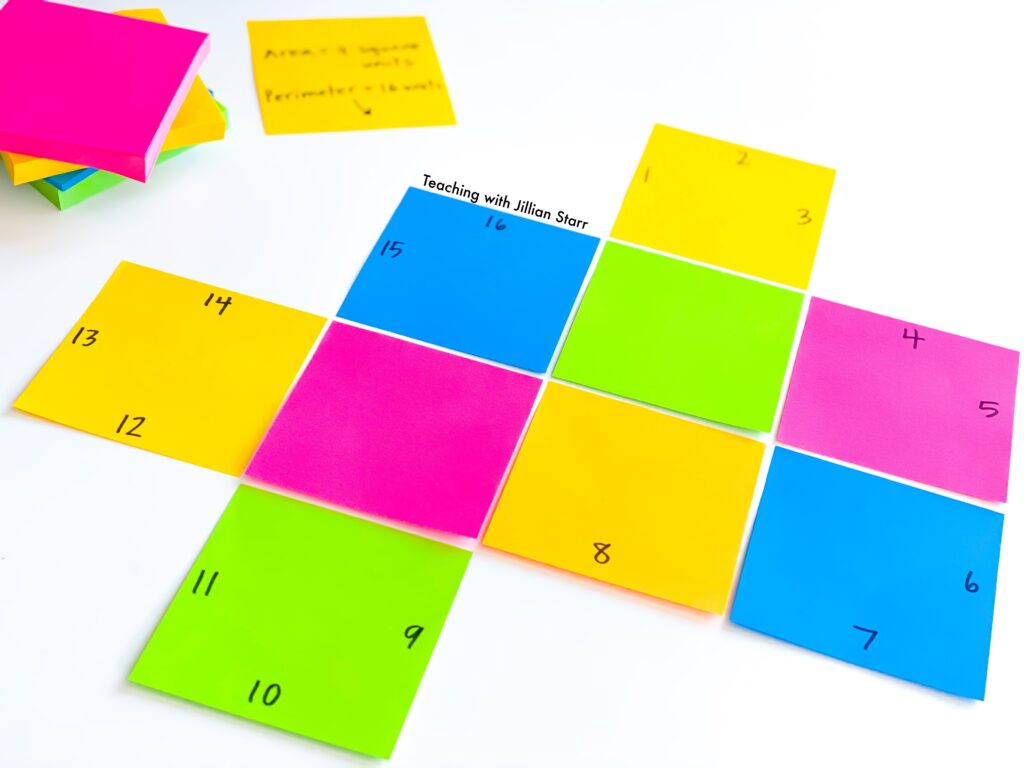
Another really concrete manipulative are square Post-It Notes! (And who doesn’t love a pop of color?) These are amazing for group discussions in particular because you can model and manipulate area and perimeter on the board. You can easily add and remove square units as well!
These can be used to easily create visuals for anchor charts, bulletin boards, group work, and so much more. The only caveat is to make sure students are using SQUARE post-its.
Explore Area + Perimeter with Tape and Floor Tiles
Square colored tiles support the construction of area and perimeter within a miniature world. Now, it’s time for real-world application.
Perhaps you could say I’ve been lucky. The majority of my classrooms have floors of 1×1 square linoleum tiles. They aren’t the prettiest sight to see, but they are beneficial for area and perimeter teaching.
Students form teams to measure our classroom and its partitioned spaces. There are two ways students complete this activity:
- Students tape the perimeter of the classroom, along the outer floor tiles. They count the perimeter and calculate the area of the entire classroom, using square foot units.
- Students use tape to measure specific areas within the classroom. You can ask students to measure a section of the classroom, then measure it. Or, you can give students a specific measurement of area (ex: 12 square feet or a rectangle with the perimeter of 8) to tape.
Added bonus to letting students tape off sections: Whenever students move around the classroom, the concept of area and perimeter is reinforced. Lining up? Students pass an example of area and perimeter. Putting away their work? They have to pass an example of area and perimeter. It’s an awesome way to get those visuals out there (and not take up tons of precious bulletin board space).
Pattern Blocks as an Advanced Manipulative for Perimeter
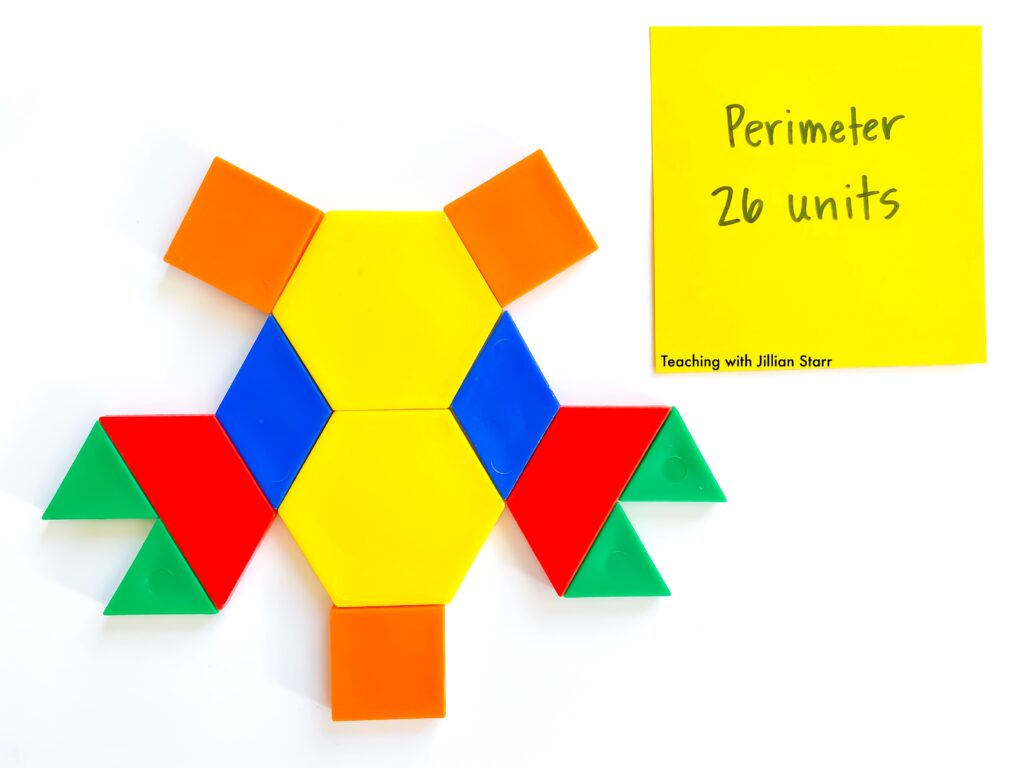
Pattern blocks are manipulatives that support a more advanced understanding of perimeter. Pattern blocks come in handy when students are ready to move beyond rectangles, and think more about sides. Why? Pattern blocks come in multiple shapes (hexagon, trapezoid, square, triangle, parallelogram, and rhombus) but maintain a standard side length. For my activities with students, I stick to the colorful tiles: hexagon, trapezoid, square, triangle, and rhombus. The triangle is the basic shape that can make up all the other four.
How I Introduce Pattern Blocks for Perimeter
I introduce pattern blocks much like I introduce square colored tiles. However, this time we’re ONLY focusing on perimeter. Sometimes it helps to separate the two skills to really help internalize which is which.
Explore: As a whole group (or small group), we examine the different shapes and identify the similarities.
- Each side of the triangle and square is equal.
- The trapezoid is made up of 3 triangles.
- The hexagon is six triangles.
- The rhombus is two triangles.
Practice: Students engage in specific tasks. They use pattern blocks as a manipulative to create specific perimeters. When finding perimeter, one side length of the triangle equals 1 unit. Some examples of tasks include:
- Create a shape with a perimeter of 16 units.
- Create a shape with a perimeter of 20 units.
- Create a shape with a perimeter of 20 units.
Record: Using their math journals, they record the prompt and the solution. Quick finisher? Have them find and record another way to attempt the same prompt.
Extension: Allow students to create their own pictures out of the pattern blocks. This low-floor/high-ceiling task allows students to challenge themselves. When they are done, have them find the perimeter of their creation. You can even take a photo of their projects and print them to hang in the classroom or create additional math problems for their peers.
Differentiate with Geoboards
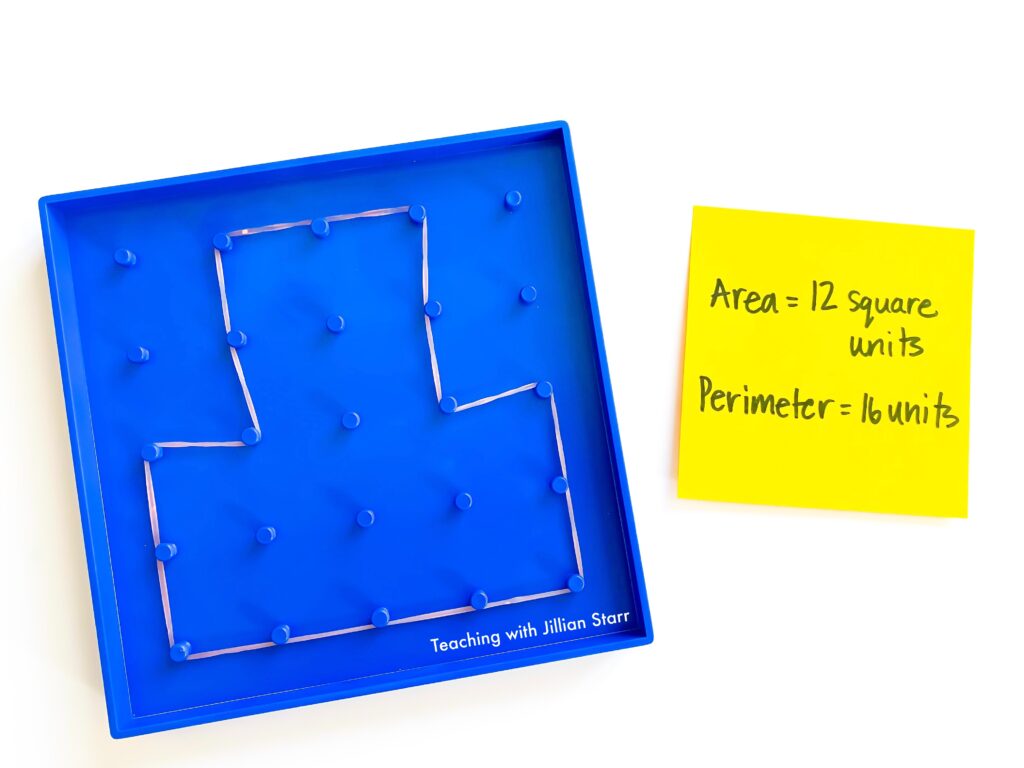
In a word: Geoboards are fantastic. They are a go-to manipulative for area, perimeter, and all geometrical concepts.
Geoboards are wood or plastic squares with an array of pegs. Bands loop and stretch from one peg to another, creating line segments. Those line segments form shapes with simple-to-calculate areas and perimeters.
Advanced math thinkers rejoice. Geoboards have the flexibility of use that allows for students to explore new, related challenges. (Bonus: You can create half of a square unit with this manipulative that you cannot do with square tiles or pattern blocks.)
Using Geoboards as a Manipulative for Area and Perimeter
Start with simple tasks. Ask students to create simple shapes using only horizontal and vertical lines (this will avoid discussing half units at first).
Have students to calculate the perimeter. The perimeter calculation is often less complex than that of the area with geoboards. Students may have to segment their shapes into square units to find their area.
When students seem to grasp the concept of finding area and perimeter with vertical and horizontal lines, you can begin to introduce diagonal lines and partial square units. This can prove to be a wonderful extension for students who are further along in their understanding. (Just remember that the the sides of diagonals are actually greater than one unit, so focus on area of this extension.)
Geoboards are my Go-To Activity for Fast Finishers
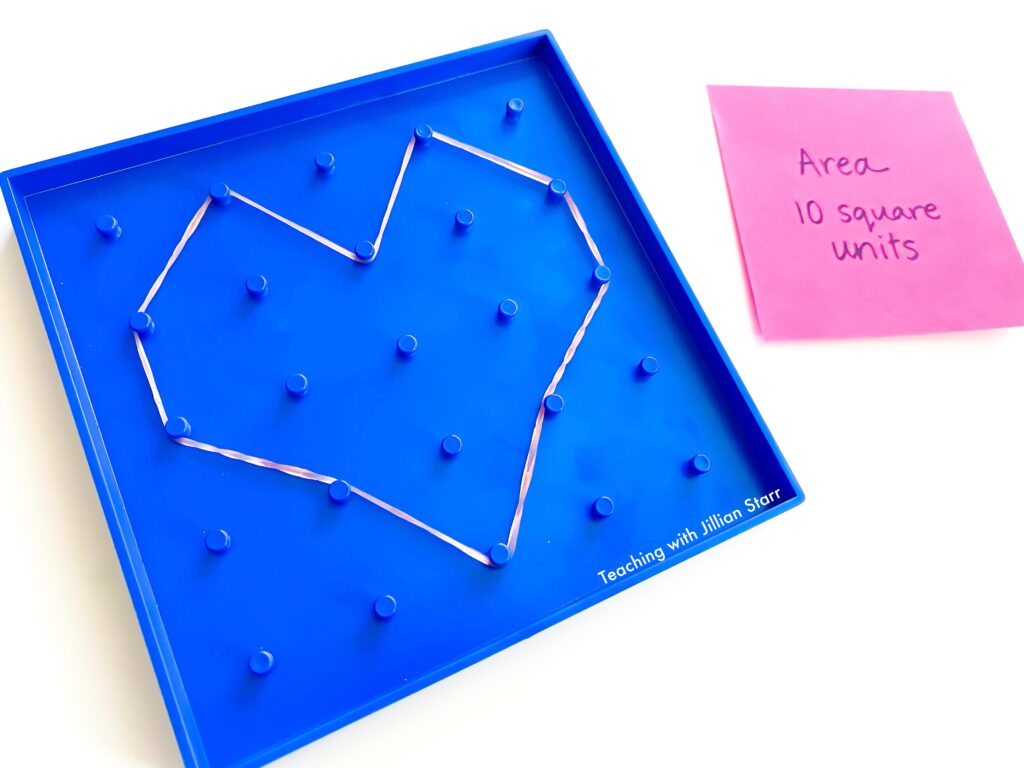
Geoboards offer endless exploration of the area, perimeter, and shapes. You will never hear the dreaded “I’m done!” coming from a student. Open-ended tasks for geoboards offer endless exploration and many solutions to a single task.
Note: Physical geoboards are preferred. However, there are a few virtual options available if you don’t have a set of physical boards. The Math Learning Center website has three free versions, depending on your available technology.
Gross Motor Exploration: Square Placemats
Some students need additional support. Sometimes I notice that students aren’t grasping concepts. So, I look for ways to engage their whole body and gross motor skills. And have fun!
Square placemats are an excellent, full-body precursor to square colored tiles. Additionally, they are perfect for full-class demonstrations.
First, students can create giant arrays with square placemats. Like square colored tiles, students start with an area or perimeter task. For example, create a rectangle with an area of 10. They construct the shape using the placemats.
That’s when the real fun and exploration begin! Your students have constructed a large shape. However, they need to see if it meets the task specifications. To find the perimeter, students can physically walk the perimeter of those arrays. They can do 1-1 correspondence using their own body, moving from one tile to the next. Then, they can find the area by stepping on each square placemat.
Simplified use of square placemats includes rectangular shapes. More advanced versions of these tasks can include shapes that can be broken down into different size rectangles.
Connect Gross Motor Exploration to Abstract Thinking
Square place mats are a manipulative that helps students use their gross motor learning to explore area and perimeter. But, students still need to connect physical exploration to the ultimate goal of abstract thinking. Like other manipulatives, I have students record their exploration in their math journals.
All mathematical thinkers can engage in hands-on learning around area and perimeter. I hope this post gives you various ideas to support your range of learners. As your virtual teammate, I would also love to hear about the innovative manipulatives to teach area and perimeter that you implement in your classroom.

Hi, I have really enjoyed learning how to use hands-on manipulatives from you. I am not an elementary teacher; however, the majority of my middle school and high school students are at 2nd and/or 3rd grade math level. I have tried for years to find ways see through their eyes. I desire to understand how they learn. I look forward to the sparkle in their eyes when they finally comprehend. It has been difficult trying to teach Algebra and Geometry to students that don’t know their shapes nor their multiplication tables. Thank you for shining a light on what I have been missing for years.
These examples were crystal clear and understandable.
You have excellent materials and strategies on the different ways to teach math concepts using manipulatives. Thank you for sharing your math expertise with us.