Measurement standards are present from Kindergarten through High School. This means that building a solid foundation in Kindergarten and first grade is necessary for students to be ready for more complex work in grade three and beyond. So let’s dive into how young students begin to learn about measurement – by measuring lengths indirectly!
How to Introduce Measuring Length Indirectly
What do we mean by measuring lengths indirectly? Unlike using a ruler or some other traditional measuring tool, young mathematicians use other units, sometimes lining them up end to end and counting to determine the length of an object. Measuring lengths indirectly can then be extended to compare the lengths of objects.
In order to begin this work, students, of course, need to be able to compare the lengths of objects directly. That is, they should be able to place objects next to each other and determine which is longer and which is shorter.
While, of course, measuring length this way will not give students a standard measurement that others can easily replicate, it introduces a few important measurement concepts:
- When measuring, we can’t overlap the units or tools we are using.
- When measuring, we can’t have gaps between the units or tools we are using.
- If we use different units or tools when measuring, we’ll get different measurement values.
While it can be tempting to jump right into introducing standard units, it is important for our youngest students to experience measurement in a more concrete way in order to internalize these critical concepts. In fact, measuring with a standard measurement tool builds directly upon this foundation.
Using Classroom Tools for Measuring Length
Let’s delve into a specific activity that we will refer to throughout this post. For this activity, I tell students that I need to buy bins to store our independent reading books but I need to make sure all of our books will fit. To do this, I need their help to measure the length of each of their independent reading books. I leave out a wide variety of tools: tiles, counting bears, paper clips, counters, string, etc. I then tell students that they can use whatever tool makes sense to them to measure their books and that they need to record their thinking and measurement so that I can find bins to fit their books. If you don’t feel comfortable using this scenario because you won’t actually buy new bins, that’s OK! Tweak the “story” to make it more authentic to your situation! I have used this activity with various different stories: book bins, arranging desks, reorganizing our math manipulatives, etc.
Eliminating Overlap When Measuring Length
When students embark on measuring length, they may initially gather a handful of their tool of choice and then simply push them up against the item they are measuring. Students who do not yet understand the need to eliminate overlap between units will not line up their tools but rather “bunch” them. Their measurement might look something like this:
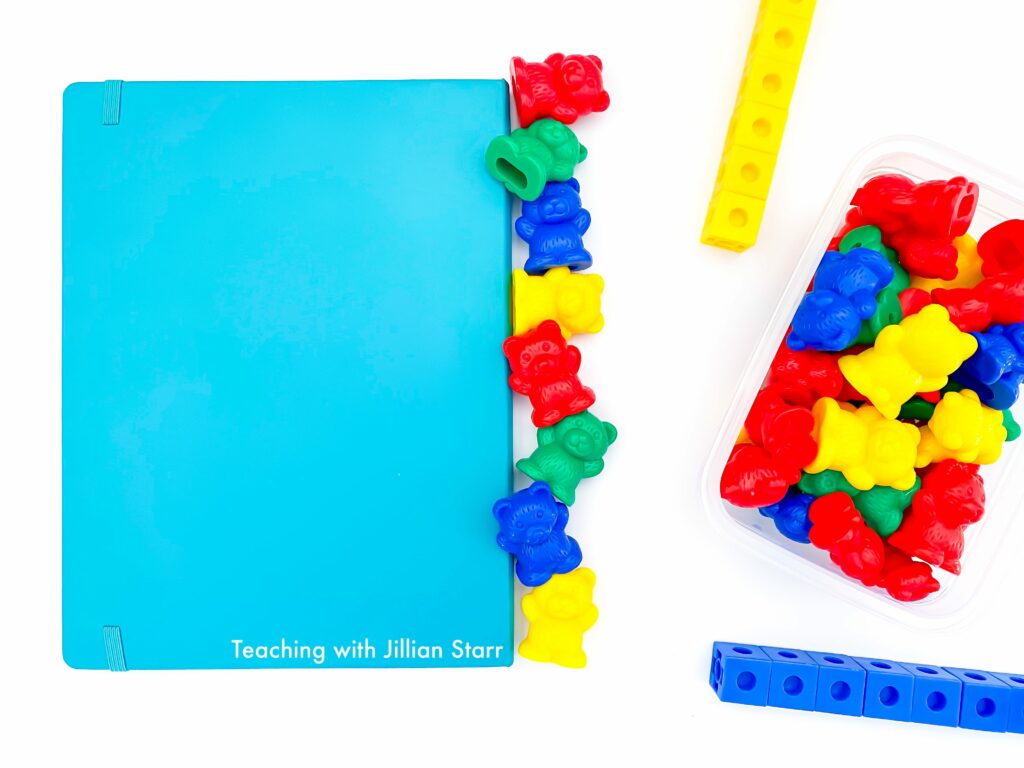
A student who measures their book in this way would say their book is 8 bears long. However, what they are unaware of is that one of the bears is not measuring the book at all.
Of course, students who do not understand the need to avoid overlapping tools may demonstrate their misunderstanding quite this obviously and may overlap their objects only slightly. Regardless, it is important to emphasize this point by showing students various ways of measuring length and leading a discussion comparing them.
After students measure their books I select student work that I can use to emphasize the concept of not overlapping units. I look for a student who lined up their tools without overlaps, a student who very clearly overlapped multiple items, and a student who overlapped only slightly. We then discuss their work and whether we agree or disagree with their measurements. Questions I might ask to guide this conversation include:
- Explain how you used your tool to measure your book.
- How do you know that your book is __ long?
- Why did you line up your tool that way?
- Who agrees/disagrees with __ and can explain why?
- Does that overlap matter? Why or why not?
Saying Goodbye to Gaps When Measuring Length
The next concept that is important for students to internalize is the idea that when measuring length, we do not want gaps between our units or tools. Students who do not understand this concept might measure their book as shown below.
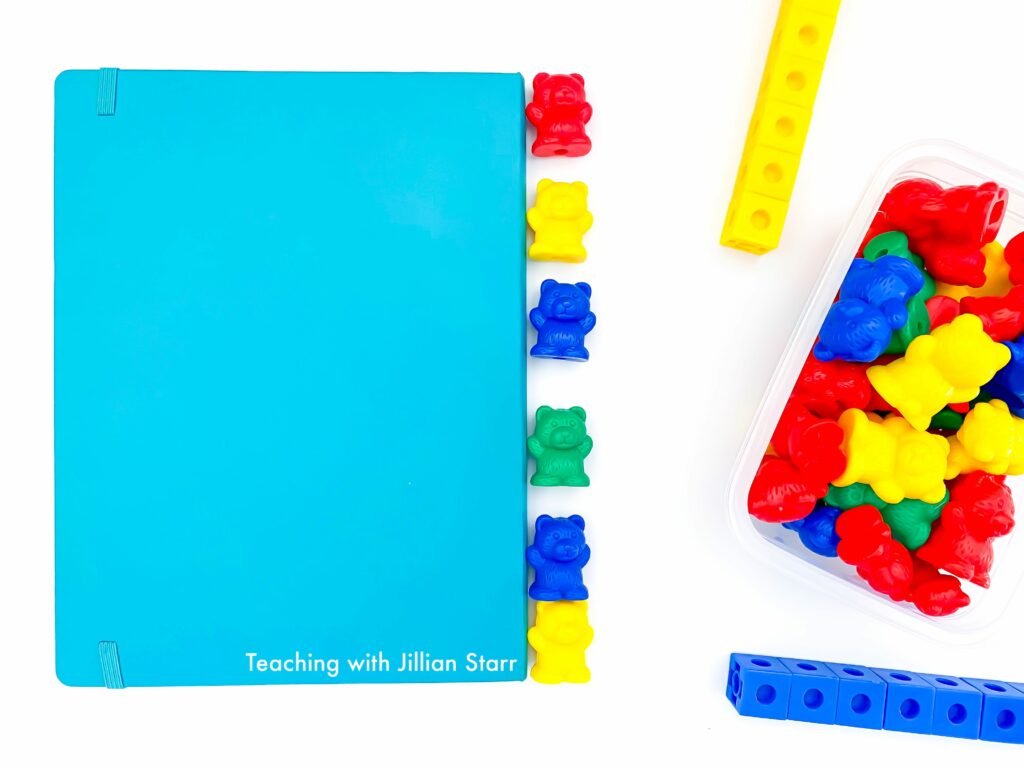
This student has demonstrated some understanding of measuring length: having no overlaps between bears, starting measuring at one end of the book, and using the same size units, they are still not getting an accurate measurement due to the gaps between their tools.
Other students may not leave gaps between the bears but instead will ignore the starting point, either starting by measuring the length of the book before the book begins or starting a bit in from the edge of the book.
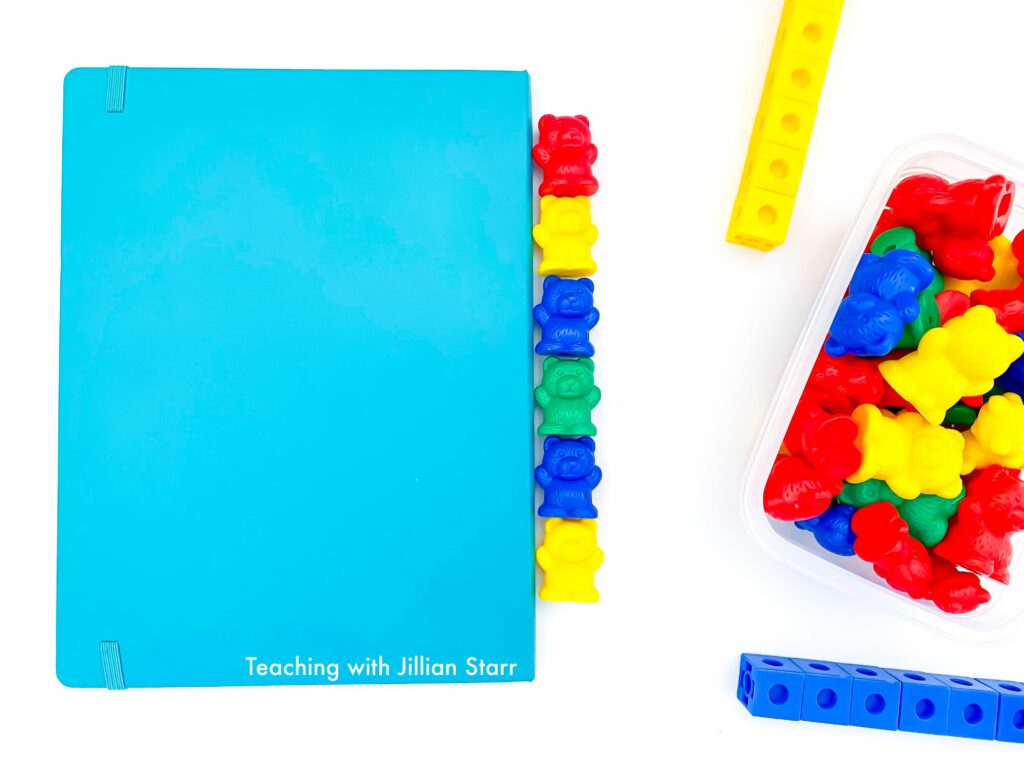
Again when students finish measuring, I’ll select a few students’ work to guide the discussion. I’ll look for students who had gaps but aligned their tools with each edge of their book, students who had little or no gaps but did not align with the edge of the book, and students who aligned their tools with the edge of their book and had no gaps. The questions I ask are similar to those I mentioned earlier but my focus this time is to support students’ understanding that when we are measuring lengths, we cannot have gaps anywhere in our measurement, including the starting or end point.
- Explain how you used your tool to measure your book.
- How do you know that your book is __ long?
- How did you know where to start/end measuring?
- Who agrees/disagrees with __ and can explain why?
- Does that gap matter? Why or why not?
Moving Into Standard Measurements
Finally, after students understand the importance of avoiding gaps and overlap, we begin to investigate the size of our tools and how that affects measuring length.
When students do not understand the need to use equal-size units when measuring the length of an object or the need to use equal-size units when comparing the lengths of objects, their measurement may look something like this:
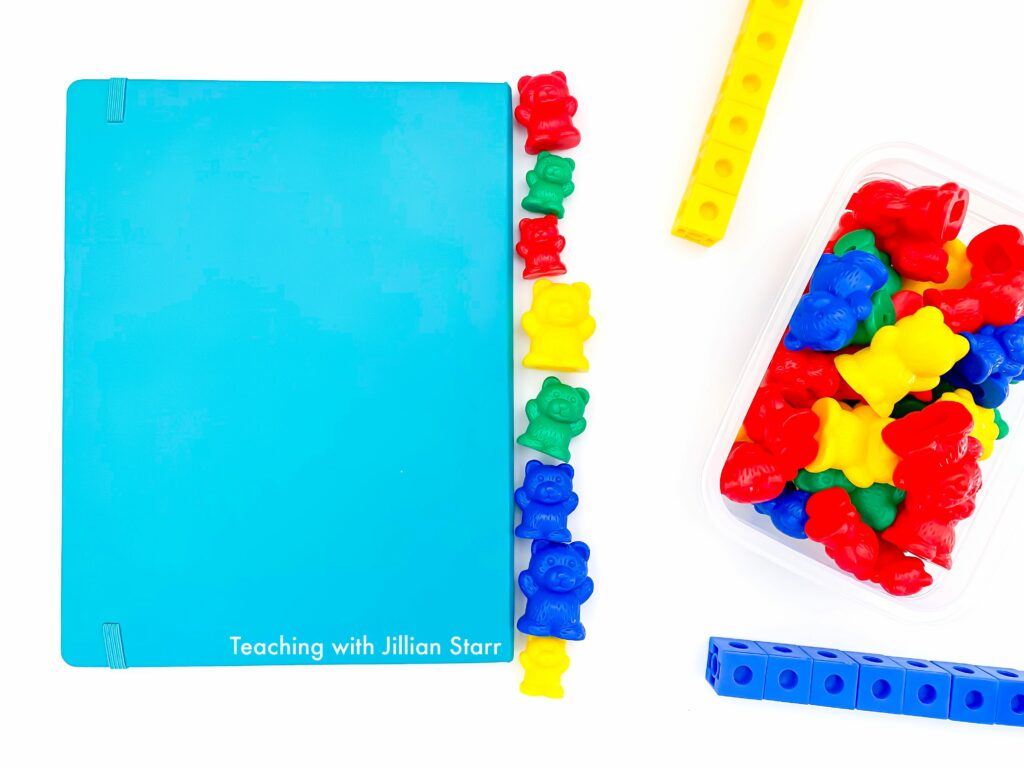
This student clearly understands the need to avoid gaps and overlaps between their tools as well as align their tool with the edge of the book. They even used all of the same tool: counting bears. That is a lot of wonderful math understanding! However, in this case, the student used varying sizes of counting bears. Some of their units are smaller than others leading to an inaccurate measurement.
If this student were to repeat measuring the length of their book but did not use exactly the same size bears as the first time, they would likely get a different length even though the size of the book remains unchanged.
Again, I will share the work of a student who uses different sizes of the same objects within the same measurement as shown above. Together we’ll model measuring the length of the same book again using counting bears but not paying attention to the size of the bears. When we get a different measurement, we’ll discuss:
- Why did we get different measurements even though we used the same tools?
- How can we use the same tool so that we get the same measurement every time?
Relatedly, if one student uses all large bears to measure a book and another uses all small bears to measure the same book, they will get different measurements.
When discussing this idea with students, I will ask two students to measure the same item but have one student use the smaller version of a tool and the other student use the larger version of the same tool, such as paper clips or counting bears. We’ll record the length of the item and then discuss why the students ended with different results from measuring lengths even though they did not have gaps or overlaps.
- What tools did each person use?
- Why did we get different measurements?
- What can we do to get the same measurement so that it’s clear how long this item is?
- Why did we get a larger measurement when we used the smaller tool?
- Why did we get a smaller measurement when we used the larger tool?
To Inches and Beyond!
Later, as students progress in their understanding of measuring length they will build upon these foundational concepts. Using the same size tool within a measure relates directly to the standardization of units, i.e. an inch is an inch regardless of where in the United States you are! The same is true of a centimeter or any standardized unit of length for that matter.
Similarly, when students begin using measurement tools like rulers, yardsticks, or measuring tapes for measuring length, the foundational concept of no gaps and overlaps will come into play. Students will need to ensure that when they move their ruler to measure the length of the classroom floor, for example, they need to line it up to where it ended in order to get the most accurate measure.
The moral of it all? Don’t underestimate the power of measurement! The work we do with our littlest mathematicians lays an important foundation for years to come. Happy measuring!
If you’re looking to continue to build students’ skills with measuring, be sure to check out this post on measuring length, width, height, and more! You can also find a favorite measuring game (with tools you already have in your classroom) in this post about Measurement Tag!

