
Teaching measurement is an annual part of our scope and sequence from kindergarten through twelfth grade. That’s why engaging, effective measurement activities are essential.
Unfortunately, teaching measurement often gets shortchanged and left to the very end of the year. Additionally, many textbooks and curricula focus on measurement conversions in isolation. And, with those units left until the end of the school year, purposeful, real-life connection is left to the wayside.
So let’s change that.
Students learn so much by digging deep into meaningful, practical math: engagement, real-life skills, curiosity, and confidence. That’s what I’ve got in store for you today. This post is all about my favorite activities for teaching measurement. I’m rounding up everything, from active games to activities for independent practice.
Teaching Measurement: Building a Foundation for Measuring Length
Teaching measurement in earlier grades can be tricky. Teachers are well-acquainted with the language, tools, and units of measurement. But our students don’t always have that exposure before entering our classrooms. That’s where beginning by teaching measurement indirectly becomes essential.
At this first stage of teaching measurement, my favorite activity doesn’t involve rulers or yardsticks. Instead, we rely on classroom materials. Anything you can get your hands on.
Start with the Hook
It starts with a problem and a hook. It goes like this: I tell my students that I need to buy new bins for our independent reading books. But, oh no! I need their help making sure all of our books will fit.
Then, I let them know that I need their help measuring the length of each of their independent reading books. Instead of giving them rulers, I leave out a variety of tools: tiles, counting bears, paper clips, counters, string, etc. Any material you have lying around your classroom can be used.
Allow Students Choice!
Next, I tell students they can use whatever tool makes the most sense. They will use those tools to measure their books and record their thinking. Recording is important! That’s how I will know the length of their book to find a bin that will fit it.
Finally, students measure their books and record their thinking.
Note: This story might change, depending on your classroom setup. When changing out bins wasn’t an option in my classroom I used all sorts of different scenarios.
You can read all about Teaching Length Indirectly HERE!
Teaching Measurement: A Fun Game to Explore Measuring Length
Allow me to introduce you to one of my favorite measurement activities: measurement tag. After building a foundation, students are ready to play with conventional measuring tools. And this game is a must if you’re teaching measurement in your classroom.
It requires very little prep, materials that you already have stocked in your classroom, and will get kids active in playing with measurement tools.
How do you play?
First, grab any rectangular paper surface on which students can write. Chart paper or sections of old bulletin board paper works great!
Next, split students into partners and give each student a ruler and a set of two dice. Then, ask students to begin in opposite corners of the paper. One is “IT” and the other is trying to not get tagged.
After each roll, students add the amount on each die. That is the length (how many inches or centimeters) they can move in any direction. Their lines can cross as many times as needed, but the tagger only succeeds when they “catch” their partner at their latest stopping point.
Trust me, you’ll need to beg them to stop playing (in the best way, of course).
Easy to Differentiate
My students couldn’t get enough of this activity. And there are ways for you to create entry points for any learner. It is easy to make slight modifications based on student needs.
Here are some ways Measurement Tag can be adapted to provide multiple access points:
- Use single dice to only measure with single-digit numbers
- Use one-inch square tiles to measure instead of a ruler
- Have students convert their measurements to centimeters
- Add up their measurements along the way
- Use higher number dice and have students measure in centimeters
- Find the difference between their partner’s totals and their own
- Include fraction dice to practice measuring with fractions of an inch
- Measure the angles from roll to roll
- AND SO MUCH MORE!
Teaching Measurement: From length, width, and height to hands-on area and perimeter manipulatives.
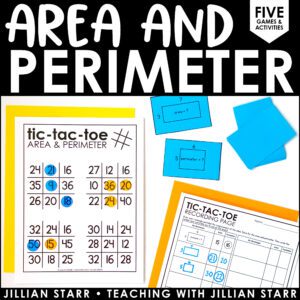
Teaching measurement in later grades, specifically third grade, starts to look slightly different. Yes, they are still working on units of measurement. But now, your students might be ready for something slightly more abstract: area and perimeter. And chances are you’ll be asked to teach them area and perimeter even if they aren’t ready.
Many curricula focus on pictorial representation for their area and perimeter unit. And there’s nothing wrong with that. Those units often rely on teachers making copies of worksheets. However, students need more than pictures to deeply understand measuring area and perimeter. And thankfully there are many wants to highlight area and perimeter in the real world and make area and perimeter activities more hands-on. Enter: math manipulatives.
When in doubt: keep it simple. Square-colored tiles are the holy grail of manipulatives. They are my go-to tool when I first start teaching measurement of area and perimeter. And, they tend to be a favorite among my students.
- Students can use one-to-one correspondence
- Students can quickly and easily translate from arrays to area
- It is easy to distinguish the perimeter (use different colors)
- You can differentiate easily based on student needs (yay, versatility!)
Ready to Advance?
Pattern Blocks are an excellent way to start teaching measurement of perimeters of non-rectangle shapes. Their multiple shapes (hexagon, trapezoid, square, triangle, parallelogram, and rhombus) are all based on the same standard “side” unit.
First, I have students explore the use of pattern blocks as a whole group. We identify the different shapes and notice (together) that these shapes have similarities and differences.
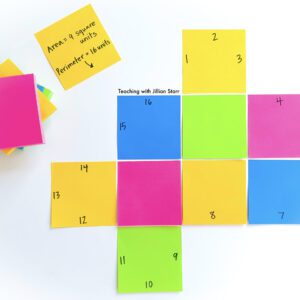
Then, students practice using them. Usually, I challenge students to create shapes with specific perimeters. For example, I would ask them to create a shape with a perimeter of 16 units. Finally, they record their shapes in their student notebook.
There are no fast finishers here. Students can continue to create shapes, finding new ways to respond to the same prompt.
An additional extension: Ask students to create their own pictures with pattern blocks. Then, ask them to calculate the perimeter.
Here’s one takeaway I hope you walk away with today: teaching measurement is way more successful with hands-on activities, but they don’t need to be fancy to be effective. In fact, the materials you already have in your classroom are enough. They translate into impactful, hands-on experiences that build foundational and more advanced measurement understanding.
Did you decide to try some of them in your own classroom or have additional activities that you swear by for teaching measurement? I’d love to hear about it!

Leave a Comment